Introduction to Black Glitter Nail Varnish
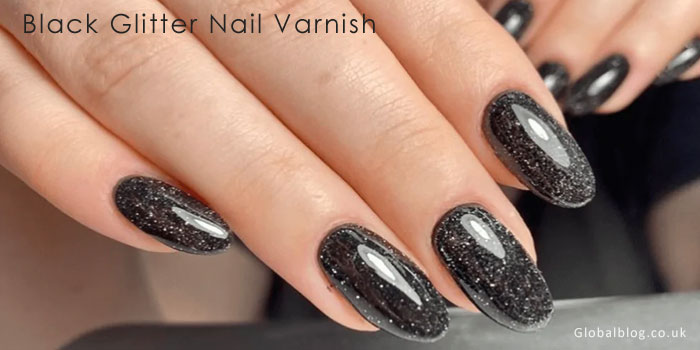
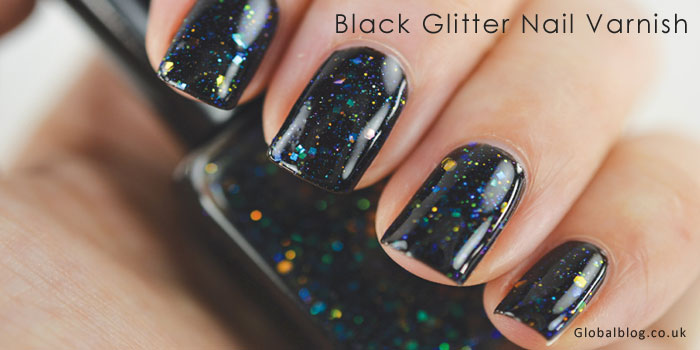
Black glitter nail varnish is the ultimate way to add a touch of glamour and flair to your look. Whether you’re preparing for a night out, heading to a festive party, or want to embrace some sparkle in your everyday life, this dazzling polish can elevate any outfit. The rich depth of black combined with shimmering glitters creates an eye-catching effect that never goes unnoticed. But achieving that professional finish at home can be tricky if you don’t know where to start.
Fear not! This guide will walk you through everything you need for perfect application, ensuring your nails shine like diamonds. From preparation tips to tools you’ll love, let’s dive into the world of black glitter nail varnish and turn those fingertips into show-stoppers!
Preparing Your Nails for Application
Before diving into the world of black glitter nail varnish, it’s crucial to prepare your nails properly. Start by removing any old polish with a gentle remover. This sets a clean canvas for your new look.
Next, give your nails some love with a quick buff. Use a nail file or buffer to smooth rough edges and ridges. This step ensures an even application and enhances the shine of your finished product.
Don’t forget about cuticles! Push them back gently using a cuticle tool or an orange stick. Trim any excess skin carefully to avoid hangnails later on.
Please wash your hands thoroughly and dry them completely. Any leftover moisture can affect how well the varnish adheres to your nails. With these steps in place, you’re ready to unleash that stunning black glitter finish!
Choosing the Right Tools and Materials
Selecting the right tools is crucial for achieving that flawless look with black glitter nail varnish. Start with a quality base coat. This not only protects your nails but also provides a smooth canvas.
Next, pick a fine brush if you prefer precision. A small detailing brush can help you reach those tricky spots around your cuticles. Alternatively, opt for an applicator designed specifically for glitter polishes to dispense just the right amount of product.
Don’t overlook top coats; they seal and enhance shine while prolonging wear time. Look for quick-drying options to save yourself some waiting time.
Keep cotton pads and nail polish remover handy as well, especially since glitter can be stubborn during removal. Having these materials ready will streamline the application process and elevate your results significantly.
Step-by-Step Guide to Applying Black Glitter Nail Varnish
Start with a clean slate. Make sure your nails are free from any old polish and dirt. A quick wash and dry will do wonders.
Next, apply a base coat to defend your nails. This layer not only shields them but also helps the black glitter nail varnish stick better.
Now, grab your black glitter nail varnish. Begin by gently rolling the bottle between your palms to mix the contents evenly.
Dip the brush into the polish and wipe off any excess on the rim of the bottle. Start at the base of your nail and sweep up towards the tip in smooth strokes.
For full coverage, you may need two coats. Allow each layer to dry before adding another for that perfect sparkle.
Don’t forget to seal it all in with a top coat for durability and shine!

Tips and Tricks for a Professional Finish
To achieve a professional finish with black glitter nail varnish, start by applying a base coat. This not only protects your nails but also helps the glitter adhere better.
When painting, use thin layers. Thick coats can lead to uneven texture and longer drying times. Allow every layer to dry completely earlier than adding the next.
For an even application, use a small brush or sponge for precise placement of glitter. This technique allows you to control where the sparkle lands.
Finish with a top skin for added shine and toughness. A gel-based top coat provides extra protection against chips and enhances that glossy effect.
Keep cleanup tools handy! A small brush dipped in acetone can help tidy up edges without disturbing your work.
Patience is key – give yourself time between steps for best results.
Removing Black Glitter Nail Varnish Effectively
Removing black glitter nail varnish can be a bit of a task, but with the right method, it doesn’t have to be frustrating. Start by gathering your supplies: cotton pads or balls, acetone-based nail polish remover, and aluminum foil.
Soak the cotton pad in the remover. Place it on each nail and wrap it tightly with small pieces of foil. This helps to trap heat and allows the remover to work more effectively. Allow them to sit down for about ten to fifteen minutes.
Afterward, gently press down as you slide off the foil and cotton pad together. The glitter should come off easily. If there’s any residue left behind, use a clean cotton pad dipped in remover to wipe away stubborn bits.
Always remember to moisturize your nails afterward! Acetone can dry out your skin and cuticles significantly, so applying some nourishing oil or cream is essential for healthy nails.
Conclusion:
Black glitter nail varnish is a stunning choice for anyone looking to add some sparkle to their nails. With the right preparation and application techniques, you can achieve a professional-looking finish at home. Remember that taking your time through the process will give way the best results.
Embrace your creativity with black glitter nail varnish and enjoy flaunting those fabulous fingertips! Whether it’s for a special occasion or just because let your nails be a reflection of your unique style.
